Sunday, 18 August 2013

Angel Food Cake - Hints, Tips & Tricks


Angel Food Cake is about to become really popular .. as the first technical challenge on The Great British Bake Off Series 4 we are all going to enjoy watching contestants wrongly greasing the tin and over beating the batter I am sure .. I haven't even seen the show yet (In fact I am writing this 2 days before it is aired) but I have made Angel Food Cake for years and am familiar with what can go wrong ... 

Angel food cake is a lighter than air cake that should melt in the mouth. It is a fatless sponge in a similar vein to a Genoese sponge but has a moister, lighter texture. I find it rather plain on it's own but it comes in to its own with a fruit compote (I love stewed apples with cinnamon) and lashings of double cream. In America it is often referred to as "white cake" and can even be purchased in packet cake form. It is usually baked in a round bundt tin.  The perfect cake tin for angel food cake can be found here , I love Nordicware tins, they are a real lifetime investment. I wonder if there will be a sell out of these after the airing of the show? Luckily I already have my own .. This one is really great as it has it's own little feet - why would a cake tin need feet I hear you ask? Well angel food cake needs to be cooled upside down, you flip over the whole cake so the sponge can "relax down" ... before the days of my bundt "with feet" I used to flip my cake and let it rest on a jam jar, the feet are far more stable though and you are far less likely to come back to a tipped over cake from other members of the family making a cup of tea and knocking your cake over (or in my experience Mothers that think you have done something really strange and turn the cake back over). 

I am not going to write up "my" recipe for angel food cake as it is a pretty standard science. I recipe I always use is here.

But I am going to write up my top tips ... 


1) NEVER grease the pan, never, ever, in a month of Sundays grease the pan. This is because the cake NEEDS to stick to allow it to cool upside down. Not even a sneaky spray of cake release, really, nothing. As for the parchment paper .. leave it in the drawer, no greasing means no lining either. 

2) Cool your cake for as LONG as you can, preferably a couple of hours, or if you can over night. This gives the cake plenty of time to stablise and relax into shape. This will make taking it out of the tin so much nicer and will avoid lumps of cake falling out when you remove it from the tin. 

3) Fold your flour in in as few folds as you can using a metal spoon. You have spent ages beating air into those eggs, you need to keep as much as you can in the batter to make sure the texture is light and fluffy. 

4) Use room temperature eggs, preferably separate your eggs a few hours before you use them (in a similar vein to the French macaroon). 

5) Once your cake is in the tin ready to go into the oven give it one sharp tap on the bottom of the tin, this will "pop" any big air bubbles and give your cake an even texture. Only one though - you got to keep that air safe! 

5) Use a long, bendy sharp knife (I actually use my cold meat carving knife) to help the cake out of the pan, sticking as close to the edge of the pan as you can, be patient with it, but if you have left it to cool for long enough there shouldn't be a huge issue. 


I am now off to sulk because if I had made it through to the final 13 this year I would have NAILED this dammit! It will be very interesting to see if any of my tips would have helped the newest batch of bakers when the first show of the new series is aired this Tuesday, 20th of August on BBC at 8pm. 


Friday, 9 August 2013

Bumbu Bali - THE taste of Bali in a jar.

Another savoury recipe today, (I promise i'll be back to baking alchemy soon!!), but I promise you this is a cracker! I am lucky enough to have been to Bali on my honeymoon. We didn't really know what to expect in regards to food, I had a vague spattering of knowledge about Indonesian food but the Balinese are proud of their roots and despite being officially part of Indonesia they do things there own way. 

 I didn't have a bad meal in Bali, in fact I would go as far to say we didn't even have a mediocre meal, we ate everywhere we could .. road side shacks to the 5 Star food at our hotel.  Our hotel was the Alila Manggis in the quieter East Bali and they are known for their Balinese cooking courses, my budget didn't stretch to a course but that didn't stop me bothering the chef for recipes! He was wonderfully helpful and after a busy service stood with me in the empty restaurant where I eagerly scribbled down recipes on the back of an envelope (Rick Stein style - get me!!). The chef explained the most important ingredient in any Balinese kitchen is the "Bumbu", this is a paste of wonder. It can be used to marinade meat and works wonderfully as a marinade for chicken or lamb for satay,  it is brilliant as a base for spicy soups or stews and most importantly the base of my most favourite food of all time, Babi Kecap - a slow cooked pork in Kecap Manis, a sweet Indonesian soy sauce.  This recipe makes about a jam jar full, it can be kept in the fridge for about 7 days but if you portion it into an ice cube tray it can be frozen and used in portions almost like a spicy little stock cube. Me and my husband have had sort of serious discussions about making this up and selling it at farmers markets. It's THAT good. 

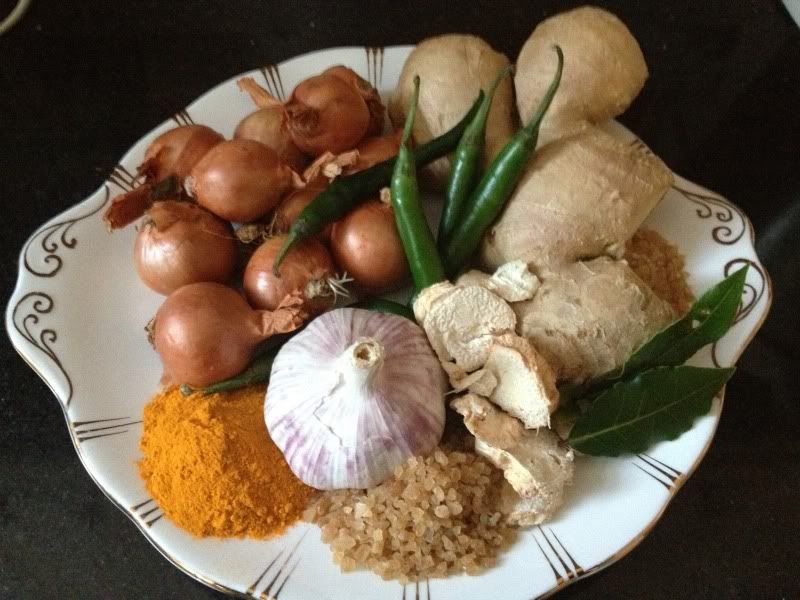
I have changed the recipe slightly to make the ingredients more obtainable to us here in the UK. I think our supermarkets are getting much better (hurrah) but I still couldn't find everything here. 


 photo 93C7A1E6-56AD-4F6B-B428-23CD56EE7C92-1854-000002C848D16B94_zpsc6325882.jpg


You will need: 

25g of birds eye chillis
115g shallots 
50g garlic cloves
25g galangal (Thai ginger) A little tip for you, they have started selling fresh galangal in my local Morrisons store. Very impressive! 
30g Ginger 
1.5 tsp of ground turmeric
25g of palm sugar (if you really can't get palm sugar brown sugar will do)
50g of ground almonds
1 stalk of lemongrass
1/2 tablespoon salt 
50ml coconut oil 
2 Bay leaves 
150ml water 


1) Place the chillis (de-seed if you prefer less heat), shallots, garlic, galangal, ginger, palm sugar, tumeric, salt, coconut oil and ground almonds in a food processor (I have this awesome little Ninja that I picked up on QVC it is my desert island kitchen gadget and perfect for this job!). Blend it all together until it reaches a fine paste. 

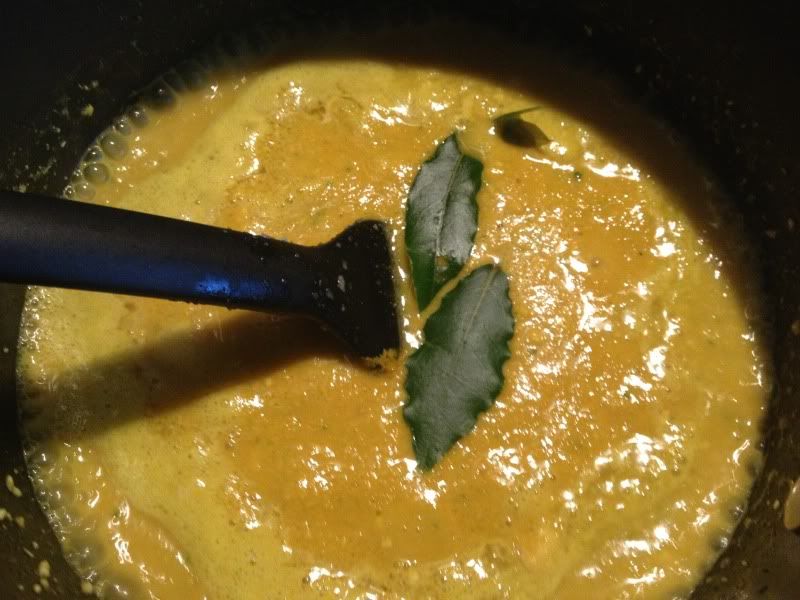
2) Place this blended mix in a heavy bottomed saucepan and turn on the heat, cook this spicy paste for a couple of minutes (careful not to colour or burn it) and then pour on the water, add the bay leaves. Bruise (smash ..) the lemon grass stalk and add this to the yellow paste of wonder .. it will look like this : 


 photo 908936FF-331A-4461-83EE-E0AB7571270C-1854-000002C86AA551C6_zpsaa621b5d.jpg


3) Keep the heat on medium and continue to stir and "cook down" the paste for about 30 minutes, the water will evaporate and you will be left with a thick paste. 

4) Remove the bay leaves and lemon grass stalk and pour the paste into a clean jar or any other convenient container (I really don't recommend plastic though as the turmeric will stain it). 

Your paste is now ready to marinate meat, pot into a spicy soup, knock up some nasi goreng or satay. I have even used it to marinate a couple of pork chops to serve with coconut rice for a quick mid-week meal. 

Tuesday, 16 July 2013

BANG BANG! Sweet Chilli Sauce

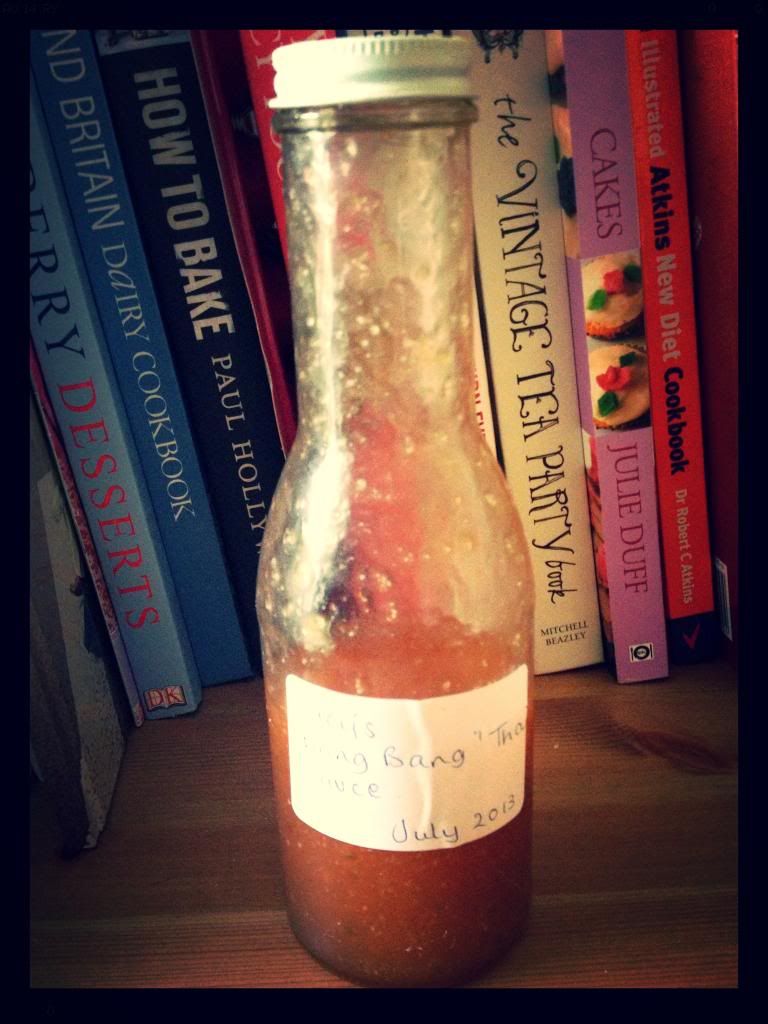
Okay, I admit it ... this isn't REALLY baking is it? But I'll tell you a secret about me .. not only am I obsessed with baking .. I am actually obsessed with FOOD in general! So from now on i'll be dropping in a few savoury goodies to hang out alongside my sweet treats! It seems we have been having some really good BBQ weather here in the UK at the moment (ok, i'll admit it, it's boiling .. our houses were not designed for this kind of of heat in mind). So, my husband and I have been spending a lot of time outside indulging in some al fresco dining. I love nothing better than rummaging in the freezer to see what we can throw on the BBQ. Last Sunday I found a whole host of odd forgotten lamb burgers, sausages and even venison burgers (HOW might I ask did I forget these??) I had chucked in the freezer at one time or another. We had a nice meat glut going on .. but very few condiments, there was the obvious ketchup, a bit of mayo and even some sour cream but *shock horror* we had run out of my absolute condiment of the moment .. sweet chilli sauce! I wondered if it would be easy to make and following the Thai principles of "hot, sweet, sour, salty" I knocked this together - I think it worked really well .. and from now on will be called "BANG BANG" sauce because it packs quiet a punch - if you prefer a milder variety leave out the chilli seeds. It is really easy to do, I just used a standard mug as a size measure. The sauce will keep in a sterilized bottle for up to 6 months - but remember with chillis the heat calms down the longer you leave it. Our current bottle lasted exactly 3 days so we certainly won't have that problem .. anyway, here goes .. my "bang bang" chilli sauce .. (By the way I have no idea if this is traditional sweet chilli sauce - it was a Sunday afternoon guess - I am sharing because it worked really well :)

Ingredients

4 red or green Thai birds eye chillis (red is traditional, I only had green in!!).
3 chunky cloves of garlic
1 tablespoon of tomato ketchup.
3/4 mug of sugar
1/4 mug of white wine vinegar (or any white vinegar will do).
3/4 mug of water
1 tablespoon of corn flour (corn starch to any US or AUS readers!).
1 tablespoon salt.


First take a teaspoon of the water allowance and mix it up with the corn flour to make a sludge - place this to one side.

In a food processor pop the chillis, garlic, sugar, vinegar, ketchup & salt. Whizz this up until all the chillis and garlic are chopped and you have a paste.

Place  this mix in a heavy saucepan and add the water. Give it a stir.

Bring to the boil and simmer for about 3 minutes.

Add the "sludge" of cornflour to thicken. Keep simmering for another 5 minutes or until it is at your required consistency. Thinner for dipping, thicker for smothering ..

Bottle up, and wait to cool ...

Enjoy!


 photo 1ea6c25d-cdcb-4fa9-9061-1b507d5cef7a_zpsbfdbc671.jpg

Friday, 14 June 2013

London Baby! Fortnum & Mason and the best Black Forest Gateaux of my life .. so far.

Should I start with an apology for the lack of blogginess? Is blogginess even a word? This is a strange time of year for me. As a teacher my professional world goes BOOM with a pile of verification, marking and portfolios and everything else has to go on the back burner for a couple of weeks. There is always a light at the end of the tunnel though, lucky for me my birthday sits right in the middle of teaching panic at the end of May and we always try to do something that gets me totally away from that pile of folders. 

This year I wanted to go to London, mainly to visit Fortnum & Mason. As a tea-a-holic and a non alcohol drinker (but definitely eater for the sake of cake of course!!)  the thought of visiting the mecca of tea blenders has always been simmering at the back of my mind. I have visited London for business and pleasure SO many times but never managed to go. So it was with a mixture of excitement and trepidation I finally walked into that duck egg blue gilded palace of tea and excess. We didn't book for afternoon tea so just walked into the icecream parlour on the first floor. There was no queue and we were seated quickly and with the type of finesse you would expect from F&M in a lovely seat. I instantly squealed with delight at the WMF cutlery so shiny you could use it as a mirror and ordered the Afternoon tea and a piece of Black Forest Gateaux from the "Viennese" selection, I was also tempted by the studel but BFG is my most favourite cake ever (tacky but true ..) so it had to be that. There was an amazing choice of ice cream sundaes on offer, all hand made with really interesting flavours - the gin and tonic sorbet sounded delicious (although I chose not to drink alcohol I love the taste of it!!). 

Here I am with my tea .. how GORGEOUS is the teapot?? After going on and on about how gorgeous it was (the silver teapot is a trademark of F&M and you can even buy a loose tea with the namesake) my husband sneaked off to buy me one .. but came back with a forlorn look when he realised the price tag of the beautiful teapots was a good months shopping budget .. another day .. a teapot so famous will be available in the future. I did come away with a deco style tea strainer and £50 worth of loose tea though .. oops! The BFG was to die for, the cherries plump and packed full of rum, the chocolate mousse layer light as a feather and the cream unsweetened with a huge swirl of whipped double cream on the side (how I prefer it). I think that it is the best slice of BFG i've ever had - and i've eaten this cake in Vienna, Budapest & Prague - All in all it was absolutely delicious and well worth the £14 per head (yep, cake and a cuppa £14 .. but it was a treat!!). I now need to make a special trip to Germany to see if they can better it ... that gives me an idea for a holiday ... 


Friday, 24 May 2013

Friday night and the baking cupboard of doom ...

Friday evening ... here finally! Not only Friday night, THE Friday night before half term. As a teacher this particular Friday evening always has a wonderful feeling. A whole week of freedom, lie ins, time to get everything done I have needed to do for the last 6 weeks lies ahead, all fluffy and euphoric (and a pile of portfolios to put into order for verification .. but lets not think about that right now). 

Tonight I decided I had 3 choices .. all VERY rock 'n' roll and befitting to my 32 year "wild child" old self as you will see .. 

1) Lie down on the comfy sofa (husband at work so the comfy sofa is MINE all night) drink copious amounts of tea and get my Tudor fix in the company of Anne Boleyn, Thomas Cromwell and a bunch of very clever, interesting historians .. right up my street (I am a history obsessive for those who would like to know ....) 

2) Sit at the kitchen table rocking out to Absolute 90s, pretending I was still at The Room in Hull as a student back in 1998, a bit of Jarvis, a bit of Primal Scream, a blow out to Rage Against the Machine .. and start on the portfolios  finish a painting I started 2 years ago

3) Bake and catch up with the blog. Bread for the weekend, a cake to use up a very kind birthday gift of tons rhubarb from my bosses allotment and maybe even a cheeky play with Blob, the sourdough starter. 

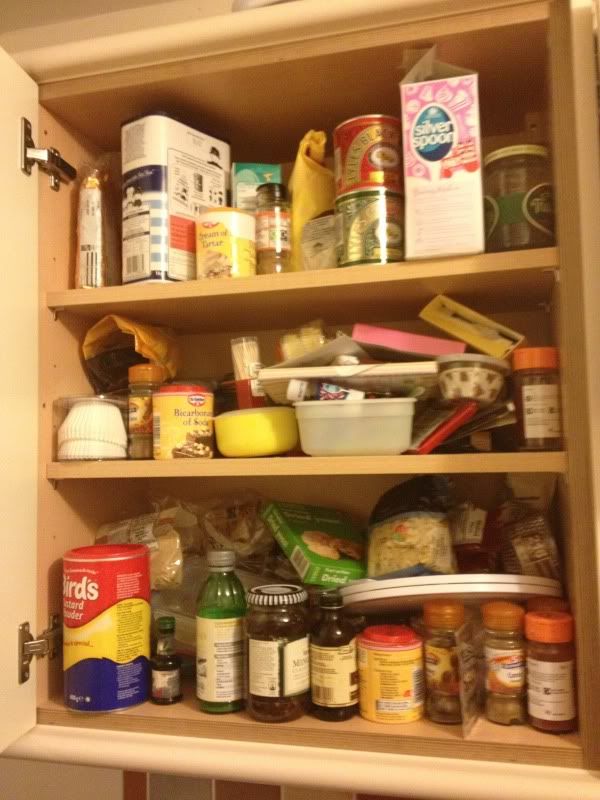
It was a no brainer .. bake of course .. then I remembered .. THIS .. THE CUPBOARD OF DOOM ... 


 photo 55ACEBAF-9CE6-4329-BCAA-1CEBA129A750-1992-000002BB85F7F6B3_zpsb6a53a57.jpg

The cupboard of BLOODY DOOM ... last time I baked, last week a porter cake for a birthday I SWORE I was going to sort the cupboard out. I can't get to anything, reach the sugar, out falls the baking powder. Fancy a vanilla pod? Not before whole jar of cinnamon falls down and breaks all over the floor (true story). Don't even get me started by the meringue ruined by a small dredging of ground almonds & salt as I reached for the cream of tatar. Want the really bad news? This is only cupboard 1 of 3 nightmares .. there is also the bread cupboard and the tin store, I couldn't show you the bread cupboard. It's X rated. The rye flour cries when I open the door "let me out of this hell hole." 

Do you know what I did? I jumped straight on the sofa and got better acquainted with Anne Boleyn. I just CAN'T do it ...

So any hits, tips or words of comfort to help me do this tomorrow (or how fellow bakers keep organised and saintly) would be well received. It's times like this when being creative SUCKS ... maybe I could call it modern art? Could you cope with your baking things like this? How do you stay organised? If you can help please leave a comment or call 0800-HELP-ME immediately! 

Saturday, 11 May 2013

Fudge Iced Ginger Bread - Back to school dinners


 photo E805A57C-FDB2-46FD-A911-1C7DC1F49D1D-20730-000023D4B71E0DA1_zps866f1eaf.jpg
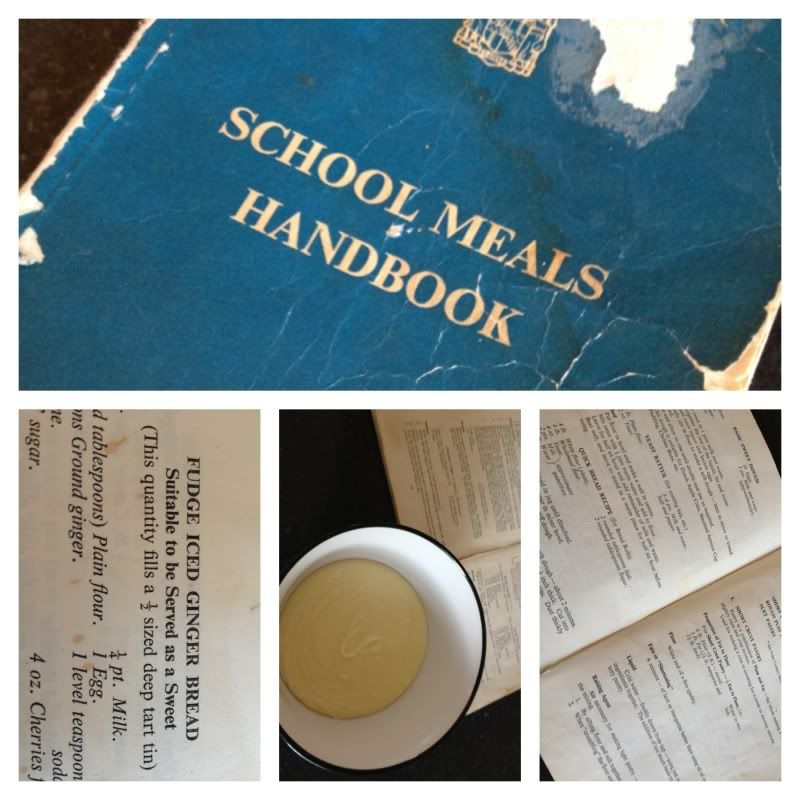
Back in 2003 I had a website, a really successful website about the social history food and of school dinners in particular. I recreated them and it was incredible how much interest there was especially in the puddings, this was the days before The Bake Off, the baking "renaissance"  and the internet being saturated with recipes. I had a sort of monopoly .. I was even in discussions about a book with a publisher but then life happened, my Dad was taken from us and the hands of time seemed to stop, I couldn't face looking at the website anymore or even thinking about it, what was such a passion became sickening over night, the human brain is a funny old thing and I often think about what "could have been" if I had kept going. There is no point dwelling on the past though and those recipes are still there in the form of my tatty old 1960s Birmingham school meals handbook along with my scrawled improvements or modern measurements / temperatures so I thought it was about time I brought some of them back to life again! Of course there was Chocolate Concrete, Manchester Tart and Sticky Toffee Pudding but my personal favourite has always been this the "Fudge Iced Ginger Bread", oh how I LOVED it .. always being obsessed with my belly I used to dream about it all the way through double maths and would be absolutely gutted if my year group was on "last dinners" and it had all gone. It has been many years since I have made it but now as the delicious of waft of ginger still lingers in the air of my home I think the love affair is about to be rekindled... It is delicious served warm with a big portion of custard or cold on its own as an afternoon treat. It keeps for up to 5 days in a sealed container and actually improves with age, the longer you leave it the bigger the layer of sticky deliciousness on the bottom gets. 

Just a quick note on the recipe, for once margarine is best. Forget about it being made to force feed turkeys during the war and all that malarky just get yourself a tub of Stork and go with it! Butter just doesn't work as well. Also use the cheapest ingredients you have (really!!), remember school cooks had a really tight budget and there was certainly no room for organic this or fair trade that, I have used bog standard plain flour, granulated sugar and stork. I have used a free range egg though :) 

Ingredients:

For the cake: 

8oz Plain Flour
4 level teaspoons ground ginger 
4oz Stork or margarine
4oz granulated sugar 
8oz golden syrup
1/4 pint milk
1 egg 
1 level teaspoon bicarbonate of soda

For the "fudge icing"

1oz margarine
2 dessertspoons of milk 
6oz icing sugar 

1. Prepare a swiss roll tin - line with parchment paper (it is REALLY important it is lined with non stick paper). Preheat your oven to 150c / gas mark 2 / 315F

2. Put the margarine, sugar, milk and golden syrup in a saucepan and melt on a low heat until all the ingredients are combined. Leave to cool for around 5 minutes.

3. Sieve the flour into a mixing bowl and then sieve in the ground ginger. 

4. Beat the egg and bicarbonate of soda into the melted marg mixture.

5. Pour this into the dry ingredients and beat for 5 minutes (yes, 5 minutes). 

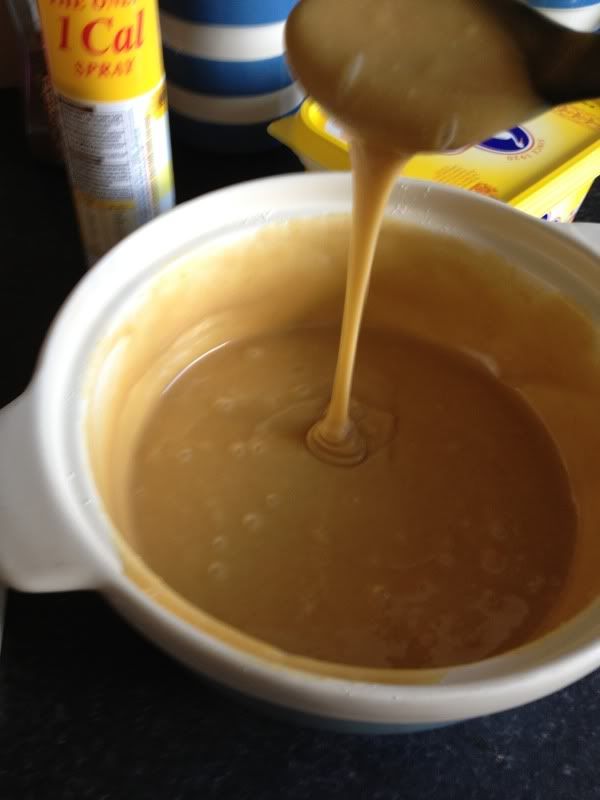
Your mixture should look like this (I always think carrot cake batter without the carrots)


 photo 902C0FB0-1FE6-478B-8A60-E1450B44A04E-20730-000023D507B44C05_zpsbc9aa41e.jpg

6. Pour into the prepared tin and pop in the middle of the oven and bake for 50 minutes (yep, that isn't a typo, 50 minutes).

Meanwhile prepare the fudge icing. 

7. Put the butter and milk into a saucepan and melt over a low heat, this won't take long, take off the heat, turn the heat off.

8.  Beat in the icing sugar, beat until it is shiny and smooth, it will be rather yellow - don't worry about it! Put to one side to cool.

9. Take the cake out of the oven, if it is "hissing" it needs a couple of more minutes. It should be spongy and quiet firm. 

10. Beat the fudge icing again to remove any skin that has formed and pour over the hot cake. Spread all over with a pallet knife and leave to cool in the tin. 

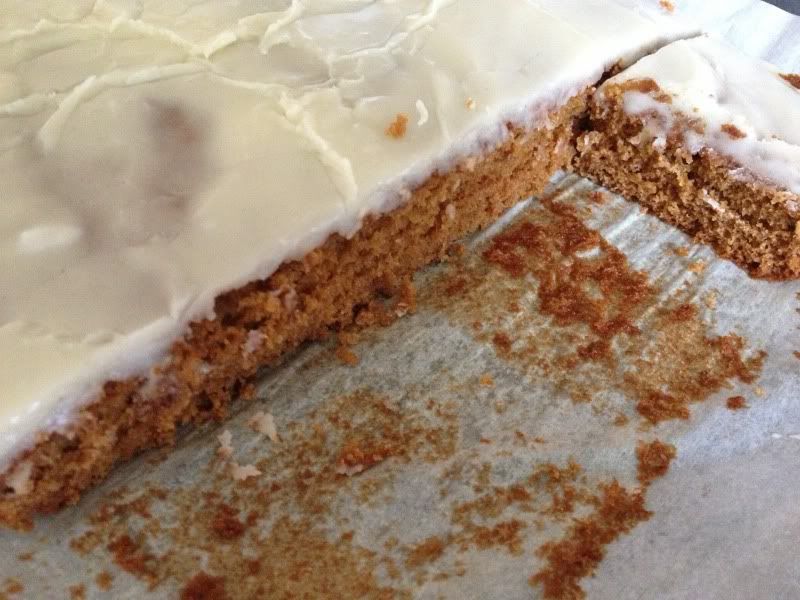
11. When cool, slice and eat - or slice and store for up to 5 days in a sealed container. It lasts about 2 hours in my house though, half is already gone as I type! This is not a time for fancy pants photos on vintage platters so here is the final masterpiece! It is simple and so SO tongue tingling delicious and so, so light! 


 photo EB8B9789-0D14-43B4-B35C-AEC764A6B38B-20730-000023D9B2FC6654_zpsafdd3c72.jpg


Friday, 10 May 2013

Afternoon Tea at Hotel Du Vin Birmingham - Review


I love afternoon tea. What isn't there to love, an excuse to sit down with my favourite drink in the world and indulge in my favourite pass time .. eating cake and scones. 

Birmingham isn't the first place you think of when you think "afternoon tea" , if you are anything like me afternoon tea strikes up images of The Dorchester, The Savoy and my ultimate "one day" destination Claridges - all in London. When a colleague at work mentioned she had been for afternoon tea at Hotel Du Vin in BIRMINGHAM and that it was lovely I couldn't wait to investigate! In fact with in 24 hours I had booked, eaten and digested! 

Booking was easy through the website  or alternatively you can always take your chances and just turn up. Afternoon tea is served daily from 2pm - 5pm and is taken in the lovely surroundings of the lounge. The atmosphere is incredibly relaxed which I loved, you know you are in a lovely place but it doesn't feel stuffy or intimidating. We were seated around a lovely crisp, white table cloth set with beautiful linen napkins and silver cutlery, the seats themselves are really comfortable - overstuffed lounging chairs and a big soft sofa. The whole place has a real vintage "shabby chic" vibe - right up my street. 

So on to the main event! The waitress came with a menu and there are several choices, the standard afternoon tea for a very reasonable £11.00 (prices correct of May 2013), a traditional cream tea for £7.50 or for a long lazy afternoon with girlfriends the "G'n'T with a gin and tonic served in a teacup for £19.50.  As I don't drink alcohol the choice was easy for me - traditional afternoon tea it was. I went for a loose leaf afternoon tea and my companion went for Earl Grey. The tea arrived quickly in a lovely blue and white porcelain tea pot accompanied by sugar lumps and a jug of milk. My companion likes to drink her Earl Grey with honey and lemon and they could not have been more accommodating finding some out for her.  The teas were delicious, mine in particular was a very fresh, light afternoon tea perfect with a splash of milk. For anybody that is unsure about which tea to choose there is a tea sommelier on hand to help you with your choice. My favourite touch was a large pot of hot water for top ups - as a tea drinker extraordinaire this was certainly needed! 

After another short wait the waiter brought us our food. A lovely touch was going through everything on the platter explaining the contents. There were several traditional tiered afternoon platters piled up with delicate finger sandwiches (salmon on brown bread, cucumber, chicken and egg mayonaise), the sandwiches were lovely on fresh bread and buttered with real butter (this for me is really important!).  After the sandwiches we tucked into light Devon scones, clotted cream and strawberry jam. The scones were good but dare I say mine are better, you needed to knife to cut into them and I always think the sign on an excellent scone is the ability to tear it open with my fingers. The clotted cream was plentiful and delicious, the jam although tasty was definitely not home made and a little too sweet for my tastes. I prefer a tangy jam!

The finale was the top layer of petit fours, macarons, carrot cake, madalines and chocolate brownies. The stand out petit four for me was the madaline, really light and refreshing with just enough lemon to cleanse the pallet, perfect after a rich clotted cream scone. The carrot cake was moist with a nice sharp frosting, the brownie I am afraid I didn't get chance to try as my companions dove in before I had chance to taste (I hear they were delicious)! The only negative for me was the macaron, the texture was right with a crisp outside and a chewy centre but the taste was just non descript, I couldn't describe it as anything other than very, very sweet and they were so blue they stained my teeth - for several hours afterwards. I really don't like anything that contains that much food colouring, and dare I say blue is rarely recreated by nature as a food source so I generally shy away from blue food. I prefer a macaron coloured with natural colours from a raspberry or blackcurrant - with a taste to match. I guess I am just fussy about macarons! 

All in all it was a lovely, delicious experience. Most importantly for me there was a sense of occasion,of doing something that didn't happen every day and for £11.00 per person I think that is a bit of an afternoon tea bargain for such high quality. The service was excellent, efficient but not overbearing and we were made to feel as if we were welcome to sit in those comfy chairs all afternoon if we had the time with unlimited tea top ups, the problem is with tea top ups most people know when to stop .. I do not, I can drink more tea than most people would believe physically possible so it was a good job for Hotel Du Vin I was on a schedule otherwise I would have drank the caddie dry. 

My recommendation is to go and try it, you will enjoy it - but skip the macarons unless you want blue teeth for the rest of the day (not a good look), and boy if you have had teeth whitening or veneers steer WELL clear!  

I still want to go to Claridges for Afternoon Tea but at least now I know there is a high quality local option and I can guarantee I will go again soon! If you know of anywhere else in Brum to indulge in my favourite afternoon pass time please let me know and I will pop along soon.

The full menu can be found here 


*This review contains my own views, I paid full price for the afternoon tea and the hotel are not aware I was planning to write a review for a blog* 


Wednesday, 8 May 2013

And the award goes to ...

I am so lucky to have some fantastic friends, most of whom have been with me since my school days. We have all grown up to be thoroughly nice people (grins widely) and all ended up being super creative and involved with all kinds of arts, crafts, enterprise .. and pretty good bakers to boot. One of these people is my friend and wonderfully creative business woman Ruth Bagnall who has recently launched her website The Polished ButtonWith the recent success of The Great British Sewing Bee (wasn't it fantastic!!?) I hope some of you have been inspired to "make do and mend" or even create a masterpiece with a Singer. Ruths website is a fantastic place to start, there is a glorious selection of vintage inspired fabric, buttons, findings and patterns - and due to Ruths background in theatrical costume many pieces of real vintage loveliness for you to behold .. and buy! I especially love the vintage Vogue patterns, reissued for recreation today. 

I am totally in LOVE with these 1950's apron patterns, as a collector of vintage aprons and tea towels these tick every box for me and may even encourage me to dig my sewing machine out of the cupboard again .. that's me there on the left discussing my next book deal while waiting on my buns to come out of the oven (honest ..) 


As part of my nomination for the award I have been set a few questions to answer for Ruth .. so here goes .. 

1. How long have you been blogging and why did you start? 

I've played around with various blogs for about 5 years. I had a successful blog called Chocolate Concrete where I played with and recreated old school dinner recipes, unfortunately due a family tragedy I forgot about the blog and it slipped by the wayside. I have also blogged about my weight loss journey, I have lost 3 and a half stone so far .. but this was a private blog, just somewhere for me to jot down my thoughts and keep me going, almost like a secret diary 2013 style. Lucy Scott Bakes Alot has come from the fact friends and family keep asking me to write down recipes for them so I decided to start a blog I would also love a career in food one day so I am hoping someone picks me up and offers me a book deal or a lease to an artisan cafe (please ..).

2. What do you do in the real world? 

My "real life job" is about as unrelated to baking as it could be. I am a lecturer in an FE College. I teach young adults with moderate learning disabilities, life skills, english, maths, ict. I do try and slip a bit of baking in where applicable .. I run at least one enterprise project a year where the students make a lot of cakes and sell them to make money for a trip to the seaside. I have a lovely job but it is becoming more and more apparent that I am looking for a change of direction into a more food led career. 

3. In your dream world where money was no object what would you make / create? 

This is EASY! My dream ever since I can remember is to open a community cafe / tea rooms. A place where people with learning disability in the local community can come and learn and work in the cafe to lead to a future where their employability is increased. I would also run cookery courses in bread, cakes and using seasonal produce. I have always wanted to work for myself so if money was no object that is exactly what I would do. I can't see myself ever being a lady of leisure, I get bored too easily. 

4. What area of crafting / making do you like the most? 

This one is not so easy! When it comes to food there is not much I don't enjoy doing. At the moment my biggest passion / challenge is patisserie. I also really enjoy photography, painting and randomly natural wax candle making. 

5. And least ... 

Washing up after a huge baking session!! 

6. What have you made that you have been most proud of and why? 

Recently I had a go at making filo pastry from scratch, it was something I would have never thought to do but needed to try it for a project. I LOVED it, I made Baclava with figs and pistachios and was so proud holding up my sheets of wafer thin filo. It made me realise that with practice and passion anything is obtainable in the culinary world! 

7. What inspires you? 

My inspiration and ideas can come from anywhere really. I do like to recreate tastes of childhood which is why I am currently working on things like walnut whip cupcakes and Tangle Twister cheesecakes. The people that inspire me most have always been my family. I was brought up in a food obsessed brood and my Dad was a wonderful cook. I am also inspired by local artisans. As a child I watched every cooking program I could get my hands on so I definitely have been inspired by the late great Keith Floyd, Delia Smith, Paul Hollywood, Mary Berry, and more recently the wonderful, Hairy Bikers, Nigel Slater and  Greg Wallace!  

8. What has been your favourite blog moment so far? 

Definitely being contacted by Nigel Slater when I ran Chocolate Concrete to say how wonderful some of the recipes were! I still have that email and will probably frame it one day! 

9. Do you have a preferred way of working? Is there a radio station you listen to?

I HAVE to have a spotless kitchen. I can't work until everything is in the right place and sterilized  I am a bit of a hygiene freak. I also like to work systematically and plan ahead, I also have to clean up in between every stage. I love to listen to the radio while I bake, especially Absolute 90s for a bit of nostalgia or Radio 4. 


10. Who is your all time favorite person and why? 

Goodness. This is a challenge! I have to go with my Mom, Dad and Sister .. so that's 3!! We lost my Dad from a rare cancer back in 2006 and we miss him so much, he was incredible and although there is a huge gap in our lives now Mom, Lyns and I stick together (despite my Mom living over the other side of the world in Australia!). I have to pop my husband in here too .. he totally saved me after my Dads passing and puts up with all my wacky ways and chaotic thought processes on a daily basis .. it should be him nominated for an award! 

Now its my turn to nominate some other blogs for an award! The rules are that the blog should have less than 200 followers and I need to choose 10 .. I'm not sure I can get to 10 but ill give it a go! 

My nominations are: 


I met Xi at an audition for a well known baking show and I was blown away by one of the most passionate people about baking I have ever met! I loved the way as a scientist he was so precise and what this man didn't know about chiffon cake you could fit on a postage stamp! 


2. Lisa at United Cakedom 

I follow Lisa on Twitter and absolutely love reading her blog. She is an American baker in the UK so it is really interesting to see the "cross cultural" recipes and the blog is full of really yummy things I want to try. 

3. Emily Coates and Emilys Recipes and reviews. 

Another blog I found through Twitter (Twitter is really great by the way!!) I love the mix of recipes and reviews and the photography always makes my mouth water .. Emilys tweets are always a lovely mix of good humour and delicious food - right up my street! 


This blog should come with a warning .. EVERY time I look I feel inspired to bake and increase my skills. Jo is a perfectionist and creates the most aesthetically stunning bakes. I love the nod to the Far East where on my own travels I was captivated by the beautiful, precise and tasty patisserie. This lady inspires me to pull my socks up and make my creations look better! 

Last but NOT list Kerry and  Kerry Cooks Blog, I came across this blog searching for rainbow cake ideas (which I never made in the end .. all the food colouring put me off but I am sure it's super amazing and certainly looks that way!) and favourited it as a fave daily read, she also blogs about cats and makeup - really a girl after my own heart. 

So, there are my nominations for an award .. and here are my questions to answer if any of you lovely lot want to take part! 

1. What is your favourite baking "discipline" and why - i.e, cakes, pastry, bread .. 

2. ... and your least favourite 

3. Do you watch The Great British Bake Off .. who is your favourite EVER contestant and why?

4. What made you decide to take up blogging, what keeps you carrying on? 

5. When you are not whipping up a storm in the kitchen what else ticks your boxes to pass the time? 

6. What has been your biggest baking success .... ?

7. And disaster .. 

8. From which country do you get your biggest baking inspiration, for example rustic italian breads or the good old British Victoria sponge? 

9. Who inspired you to take up baking?

10. What is the best cake / bake you have eaten and still dream about .. ? 

I look forward to reading the answers and until next time happy baking everyone :) ! 


Friday, 3 May 2013

Walnut Whip Cupcakes (Sweetie Challenge part 1)

 photo 129FE665-E07B-4A63-A8EF-4811F90C356E-13968-0000196B035FF4AF_zps68772c34.jpg

I lost my baking mojo a bit in the last week or so,  I had been feeling a bit down in the dumps and didn't seem to be able to get inspired, however, last night during that lovely period of being awake and dropping off to sleep I remembered I had some frozen egg whites (as you do!!) and was thinking about what I could do with them, my mind is never far away from sweet delights and I wondered if I could have a go at making a Walnut Whip using Italian meringue? Hmm, I thought, might be tricky to get that cone shape without a mold .. so why not build the shape using cake as a base? zzzzzz .. 9 hours of sleep later they were still on my mind and all day at work ... SO, due to a particularly stressful day of safeguarding issues and running about like a headless Tutor I came home with my baking head in fifth gear and got cracking right away .. here is the result. This is the first of a series of recipes I have designed that remind me of my childhood, of a Sunday evening my Dad would always pop out to the local newsagent for treats and it was Mom who always wanted a Walnut Whip.

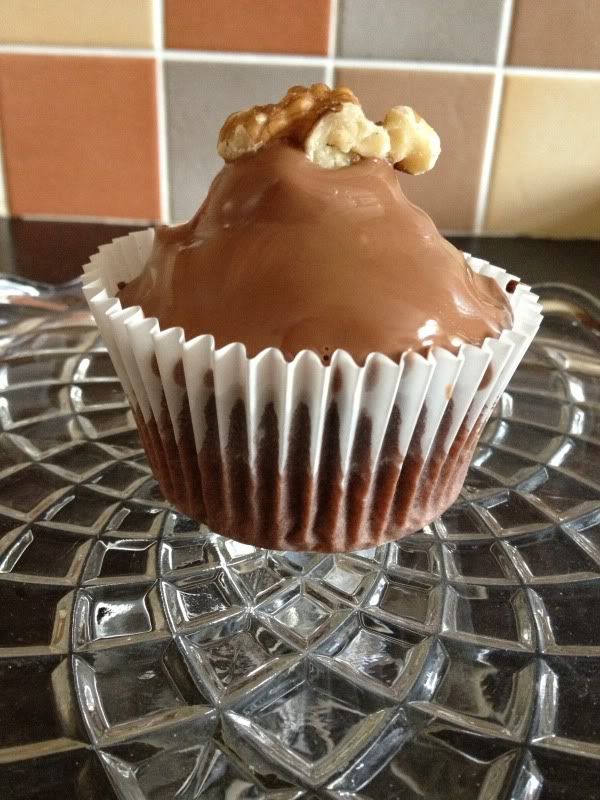
In brief the recipe is for a chocolate and walnut  American cupcake style sponge base, an Italian meringue "whip" with a slight lemony twist (I always thought Walnut Whips tasted like they had a bit of lemon in that fluffy bit ..) and a high quality Belgian chocolate shell - crowned with a walnut .. of course!


Makes 12 large cupcakes (Muffin size paper cases).

For the cupcake base (best results in a freestanding mixer). 

200g plain flour

5 tablespoons cocoa powder (I used Cadbury Bournville).
80g unsalted butter
260g golden caster sugar
4 flat teaspoons baking powder
240ml whole milk
2 medium eggs
1 teaspoon vanilla bean paste (or extract).
50g finely chopped walnuts.

For the whip see "Italian Meringue" section of my Fruit Salad pie recipe, you will need a half quantity of this recipe.
1/4 teaspoon lemon extract
If you feel like cheating .. I think you could probably use Marshmallow Fluff - although I have not tried this and can't be responsible if it's awful .. 

Chocolate Topping.

300g of the best quality milk chocolate you can afford. I used Lindt milk. 

12 whole walnuts.

Method 

1. Make the cakes


Preheat the oven to 180c and line a muffin tin with 12 wrappers.

Finely chop the walnuts.

Sieve the flour into the bowl of a freestanding mixer with beater attachment, add the sugar, baking powder, butter and cocoa powder.

Measure the milk in a jug and crack in the two eggs, finally add the vanilla bean paste.

Switch on the mixer containing the dry ingredients and butter and wizz until you have a fine breadcrumb consistency.

Keep the beater going and slowly pour in the milk, egg & vanilla mixture and beat on medium speed for 2 minutes.

Add the walnuts and beat again until they are mixed in.

Pour the batter into the cake cases until they are 3/4 full.

Place the cakes on the middle shelf in the oven for 20 minutes. They will rise into a nice peak.

When baked remove from the oven and leave in the tin for around 5 minutes then remove them from the tin to cool completely on a wire rack.

2. Make the Whip

Follow my recipe for Italian Meringue but half the recipe


When the meringue is ready add the 1/4 teaspoon of lemon extract and give it a final whip.

Put the meringue in a disposable piping bag and place to one side.


3. Make them pretty 


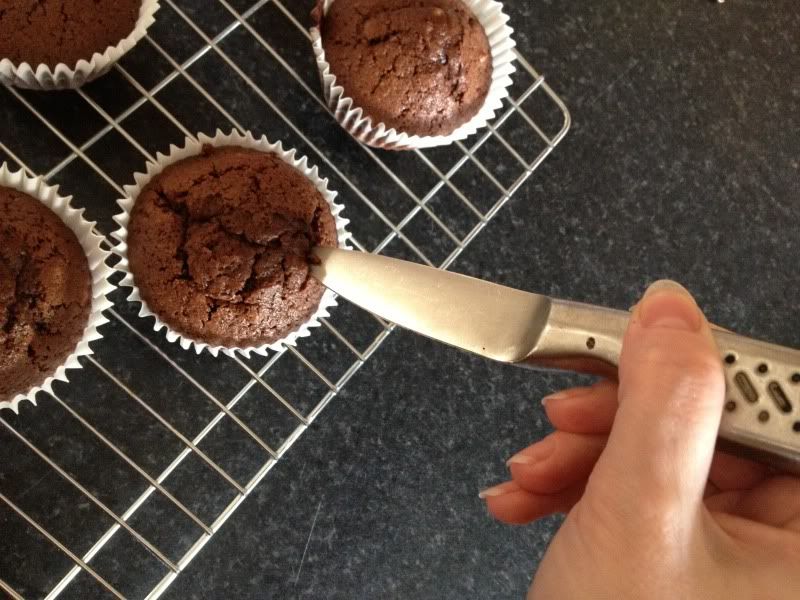
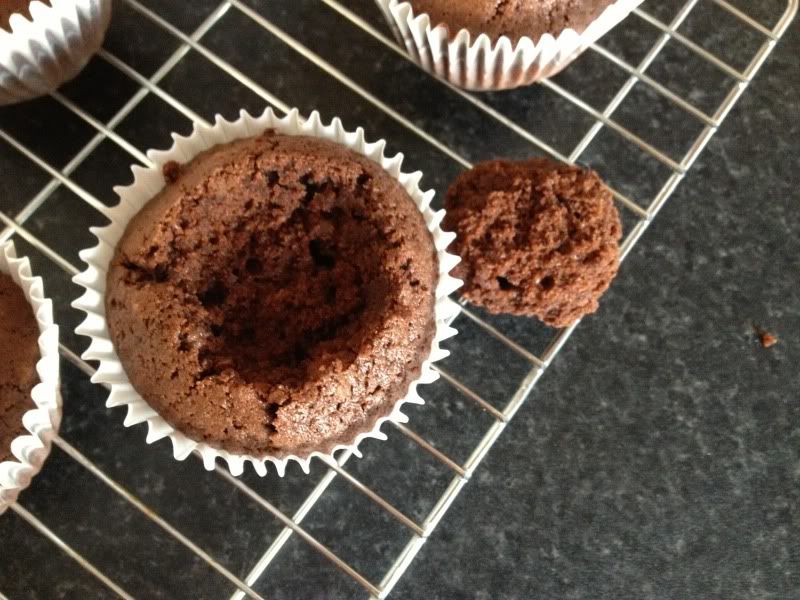
 Take the cooled cakes and cut the peaks off each cake leaving a slight crater, in a similar way as you would make a butterfly cake (see photographs). 


 photo 7B1A6398-FDE4-4BD4-A744-2CD8A5178CDB-13968-0000196AEA55B1B9_zps8e3798d4.jpg photo 5250538B-814B-4E4C-BB84-C02166E448E0-13968-0000196AFD39FAEE_zps049c59b6.jpg


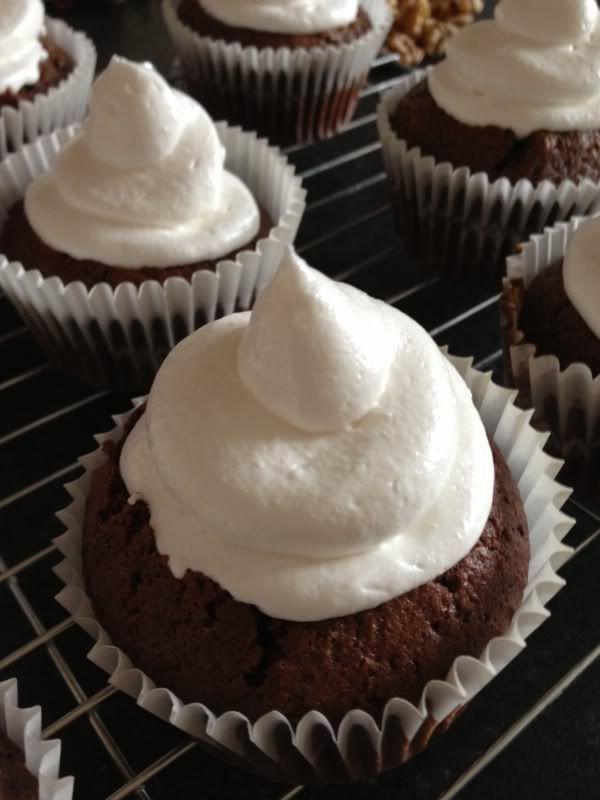
Trim the end off the piping bag (you don't need a nozzle) and pipe a swirl of meringue inside the crater and into a peak, it can be as tall as you like ...


 photo 5EC6F6CE-DCC2-47DD-9377-7BCC29A8BA74-13968-0000196AF5DF28B3_zps9ef3b192.jpg

Melt 200g of the chocolate and remove from the heat, throw in the remaining 100g of chocolate and allow the heat to melt it naturally, stirring continuously with a metal spoon. 

When all the chocolate is melted allow it to cool slightly, you need the chocolate to be on the cool side when you apply the shell to your walnut whip, this is because the meringue might weep, even though Italian meringue should be quiet stable (you don't want to risk it after all your hard work).

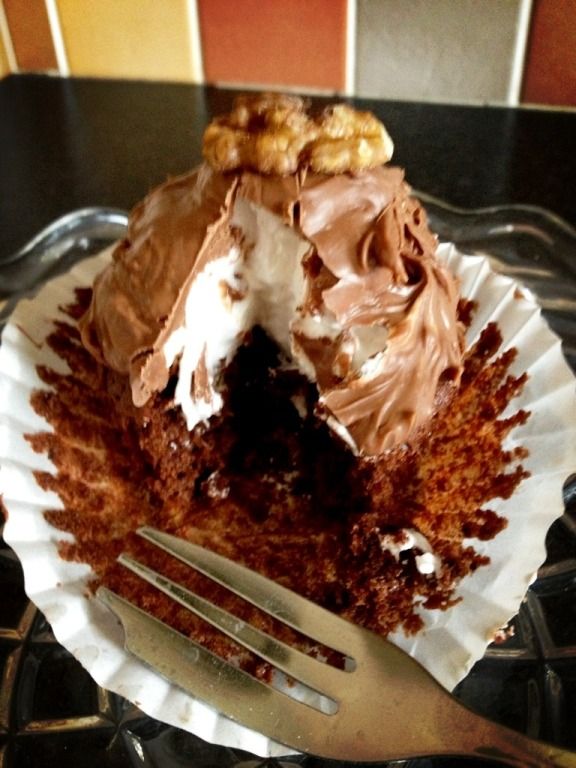
Use a teaspoon and gently pour the chocolate over the meringue a teaspoon at a time, gently teasing the chocolate down to create a shell - patience and a gentle touch is essential here. You need the chocolate to totally encase the meringue and create a seal between the meringue and the atmosphere - this will mean the cakes will be fresher for longer. 

Finally crown each cake with a walnut half. 

Leave the chocolate to completely set. 

Enjoy! These will keep for 3 days in a sealed container (if they are around for that long). 


 photo 4105281E-50D7-4AC1-8368-A5AFCE2E8657-13968-0000196AAE6A140F_zps12eca0ac.jpg

Recipe & photographs copyright Lucy Scott 2013

Sunday, 28 April 2013

Quick Weekend Bake : Sour Cherry & Almond Swiss Roll


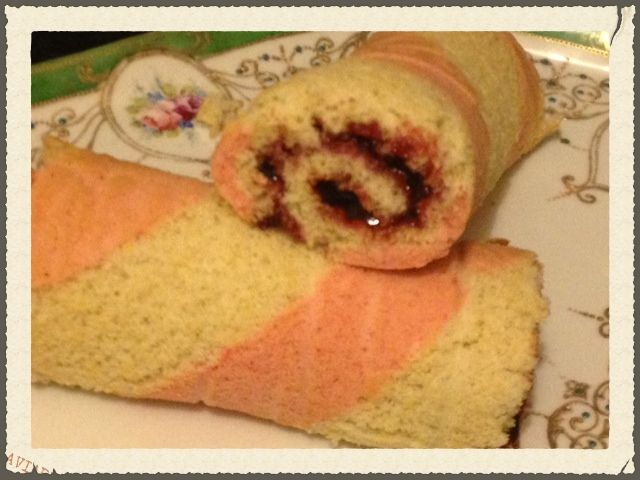
 photo 63ae74a1-b083-411d-aeec-ff25c71832d9_zps3df527e4.jpg


Sometimes I feel the need to get up and bake at the strangest times! This idea came to me during Country File on a Sunday night and was ready to eat by the end of The Antiques Roadshow! I fancied making something quick and easy and challenging myself to go into the kitchen with no recipe and make something a little bit different to the norm from a recipe I had in my head for a basic fatless Swiss Roll .. so here is my Sour Cherry & Almond Swiss Roll. I am really pleased to say it came out really well, next time I might add slightly more colour paste to the pink stripe and might even experiment with some patterns. 

The stripy pink sponge is just me being me and is totally optional ... this tastes exactly the same if you just want to make it without the stripes! 

You will need: 

3 large eggs
80g golden caster sugar 
1 teaspoon almond extract
60g plain flour 
20g ground almonds
Half a jar of sour cherry preserve (the best one I have found is available at Aldi!) 
Pink food colouring (optional). 

Swiss roll tin & parchment paper to line. 2 disposable piping bags. Extra parchment for rolling. 

Grease and line a swiss roll tin with parchment paper. Pre-heat the oven to 180 degrees C. 

Break the 3 eggs into a large bowl with the caster sugar and almond extract. Whisk until the mixture has at least doubled in volume and is at the "ribbon" stage - when you lift the whisk out of the mixture you should be able to draw a little picture in the mixture and will take about 30 seconds to disappear. If it disappears before that .. whisk more! 

Sift the flour & ground almonds into the mixture and carefully fold this in with a large metal spoon. You have used lots of energy getting the air into this mix to remember to fold - you need to keep the air in. 

When the flour and almonds are incorporated remove 1/3 of the mixture and colour with the food colouring to your taste, FOLD the colouring in. 

Place the 2/3 of uncoloured mixture into one of the piping bag and the 1/3 pink mixture into the other piping bag. 

Snip the end off the bags and pipe the mixture into stripes. Keep an even pressure and the mix should be about 2cm deep. 

Place the swiss roll tin into the oven on the middle shelf and bake for 10-12 minutes, the cake is done when it comes slightly away from the tin and shrinks. 

Remove the cake from the oven and leave to cool completely in the tin. 

When the cake is cool tip on to another piece of parchment paper and peel away the paper that was used for baking. Quickly and gently flip it over so the browned baked side is now facing towards you, the funky stripy side is hidden. 

Spread the cake with an even layer of sour cherry preserve (any jam you fancy will do though - raspberry would also complement the almond flavour). 

Roll the cake up into a tight roll, I find it easier to roll "away" from myself. Give the roll a quick roll forwards and backwards to seal it up and place the roll with the end on the bottom. 

Slice and serve. 

This recipe makes about 8 generous slices or 12 "dainty bites".  As Swiss Roll has no fat content it goes dry quickly - store wrapped tightly in a piece of parchment paper or in an airtight container. 


Sunday, 21 April 2013


The 15th of April was circled on my calendar for all the wrong reasons. Back to work after the long lie ins and freedom to do whatever I want of the Easter Holidays. Without starting a debate about teachers holidays they are well needed, and for some reason I never get done what I need to, I tend to fall into an abyss of staring into space and recharging my batteries. I always have so much baking I want to do but never quiet get round to it. For some reason when I am back at work, frazzled after a day teaching a lovely (but demanding) group of young'uns with learning disabilities I get the urge to bake with urgency again, I think it is simply how I relax and unwind. 


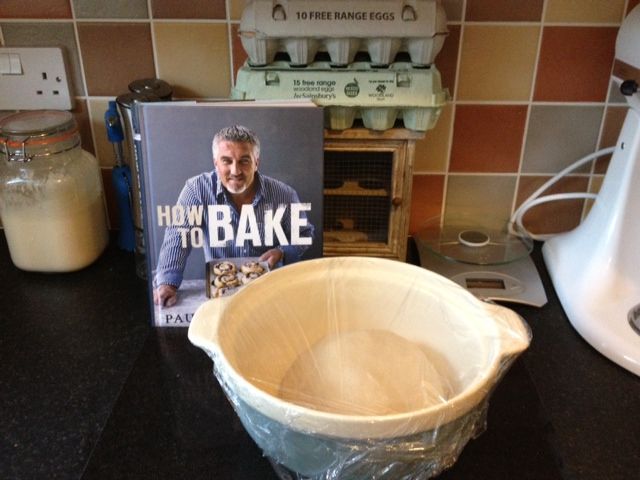
 photo paulhollywood_zps31966e74.jpeg 

So, without further a do here is my round up of "first week of term" baking. All from Paul Hollywoods "How to Bake" .. which I purchased DURING the holidays and just flicked through salivating sporadically while fixed to Bargain Hunt *Can't.move.until.after.Doctors*, oh, I did leave the house to buy a banneton but didn't use it until after the holidays :) 

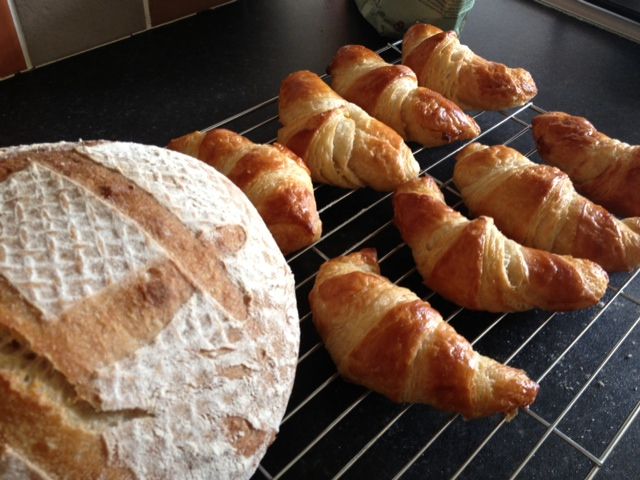
I have made,White Sourdough (blob did good), Croissants, Pain Aux Raisins - which involved my first ever attempt at crem pat, it was ace, didn't lump up and made such a quantity there is half in the freezer and finally Milk Bread.  Obviously I can't give details of the recipes here - I will leave you to rush out and buy the book for that, I can assure you it is very good, the recipes and pictures are very clear. I come at this from the angle of a home baker that knows "quiet a bit already" , BUT friends who are new to baking also claim they have had great success.  Everything tasted great and was wolfed down by the gannets at home and work but out of everything I fell in love with the milk bread. Ohhh milk bread, my new obsession. Fluffy, creamy, soft, tasty ... ohhh milk bread, I salute you, especially with eggs, bacon and a good old pork and leek sausage. 

Cue the pictures ... and if you want the recipes, you can buy the book here (saves you Googleing it hey! :


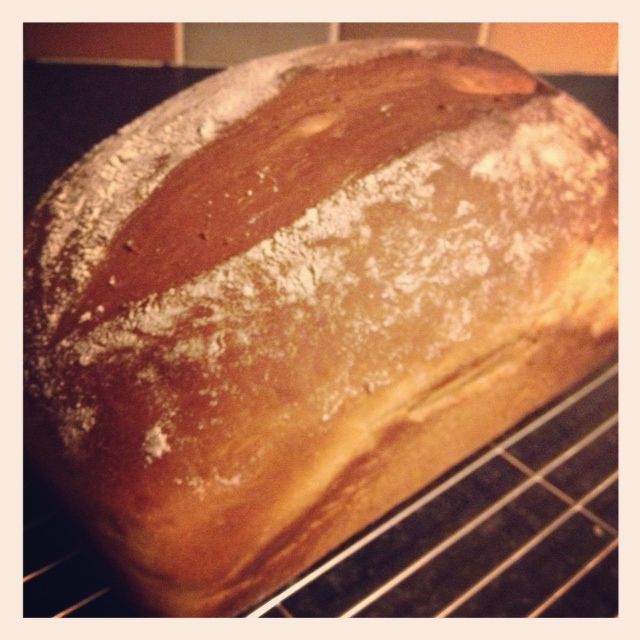
 photo milkloaf_zpscacb19ac.jpeg
Milk Loaf - creamy, fluffy, DELICIOUS 
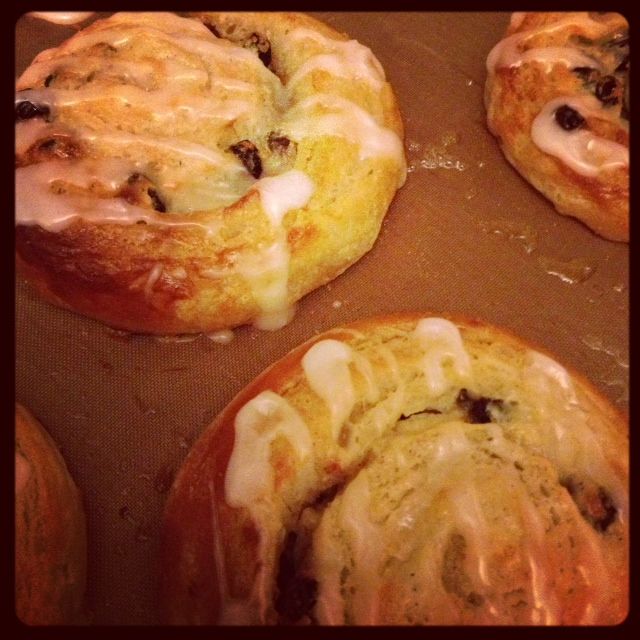
 photo painauxraisins_zps09061455.jpeg
Pain Aux Raisin, lasted 10 seconds when I took them to work for breakfast! 
 photo sourdoughandcroisaans_zpsaf019f25.jpeg
First ever white sourdough from my new culture and fresh croissants